Monthly Archives: May 2022

How to check Deeper Connect reward count?

Welcome to the post. You are reading this, perhaps you are someone who has invested in a Deeper Network device (e.g. the Mini or Pico), and has staked $DPR for rewards. Few common things that comes to mind is, how many more days left before the 9 months end and how much more rewards you may receive.

Those are exactly some of the questions I had, and am sharing with you the answers I found.

This post was originally written on 28th May 2022, a couple of days after AtomOS 1.1.16 was released.

Deeperscan.io reflects the truth

The most important resource you need is the website https://deeperscan.io/deeper. It is like other blockchain explorers but this is specifically organized for you to be able to check on your Deeper chain activities transactions. All you need is your Deeper Chain Wallet address, that long string of letters and numbers.

  • let’s start by getting your Deeper Chain wallet address. You can find it in your Deeper device’s Wallet Manager page.
  • Once you open up Wallet Manager, you’ll see the Wallet Address on the top of the page, go ahead to select and copy the whole string.
  • Next, lets use your preferred browser and hit the URL https://deeperscan.io/deeper
  • On the main page, paste your wallet address and hit search

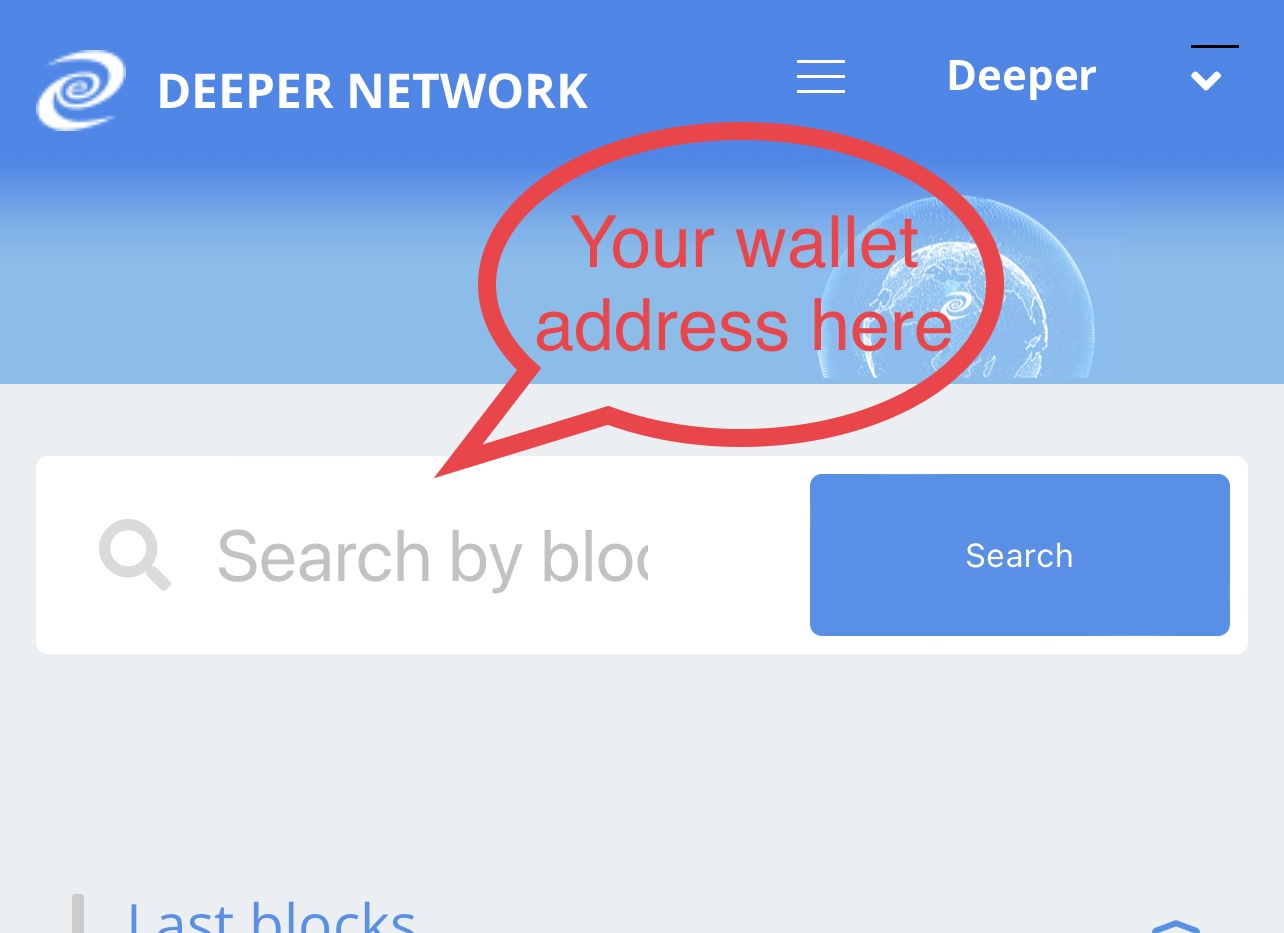
Here you’ll see the details about your wallet.

  1. Current balance in your wallet.
  2. Indicate that you have indeed staked, beyond the first 1000 DPR.
  3. The current credit level.
  4. How many rewards have been paid out.

For those on v1 of the Basic Mining program the staking period is 9 months, which is actually 270 days. As such, the total number of rewards is 270. My example above has Reward Count of 8, means there is still 262 more rewards to be issued.

Other useful tabs in the Wallet Summary page

There are 5 tabs, Transactions, Balance transfers, Roles, Balance history & Credit history. I find the last 2 particularly useful to track if there were any missed rewards.

In the Balance history tab, there is a nice historical chart of the DPR balance in the wallet. You’ll get an idea if the earnings have been coming in with a quick glance. Or if you have made any withdrawals, it will also appear.

In the Credit history tab, it gives the date and time credit has been awarded or deducted. Here is a good example on how the credit score looks like when we start with the basic staking of 1000 DPR, just to get the device on to the blockchain. I had done that on the 14th Apr. Then on the 20th May, I added a 5000 DPR stake, immediately adding another 100 credit score. However you’ll notice that the credit score on that day became 121, that is just so happen that I had also earned 1 credit score from 18th to the 20th. Hence the credit increased from 20 to 121 in one go.

Further to that, I upgraded my Pico on the 26th May to 1.1.16, and since that day, I’ve been making 1 credit every day. Prior to that version, the devices are awarded 1 credit every 2 days. Great!! Now we half the time needed to organically take the devices up a tier in earnings. Used to take 200 days, now it is 100 days.

Can we stake more along the way?

A few other common questions that came up, and I’ve found the answers to.

  1. Can we increase our stake after our initial stake?
    • Yes!! I’ve done this myself, and the credit score will immediately increase.
  2. When does the reward count start?
    • When we stake the first 1000 DPR, the Reward count remains 0. Which is rightfully so, because we are not getting DPR rewards at that level.
    • Once we increase our stake to 100, and $DPR is rewarded daily, that is when the Reward count begins to increment. That’s when the 9 months count down begins.
  3. When we increase our stake, will Reward count reset to 0?
    • No, it just keeps going.
    • I’ve seen it for myself with my Mini.
    • In other words, it does not reset the 9 months staking timer.
    • e.g. you staked 10,000 DPR on 1st Jan, 270 days later is 28th Sep. If you increased stake to 20,000 DPR on 1st Mar, the end date is still 28th Sep.

Wrapping up…

I hope you find this post useful. Especially to aid you in planning your stakes. Do be aware that v2 Basic Mining is about to kick in, reportedly on 1st June 2022. Rules are going to change, and rewards are expected to change every 3 months, depending on conditions.

If you are considering starting or getting more devices and appreciate what I’m sharing here, please support me by using the referral link to make your purchase.

Is it alright that my Helium Hotspot is taking forever to sync?

So, you’ve got your Helium hotspot set up and it has started to sync, then you find that it is taking days to weeks to sync. You’ll likely question if it is normal to take this long?

Short answer is, likely ok. But let’s not assume and figure out how to be certain about it.

Why sync? What is it syncing?

If you are not interested in the inner workings, you can skip to the next section.

When Helium started, the network is primarily made up of hotspots. Each device will participate in the blockchain, and so needs to have its own local copy of the blockchain. That sync, is basically what the hotspot is doing, downloading the blockchain and then start to keep up with the progress of the blockchain.

At the point of writing this post, hotspots have transitioned to light hotspots. However we are still in the transition period and all hotspots are still syncing the blockchain. It is the plan to eventually remove the blockchain from all hotspots.

As a result of this time of transition, there are hotspots which are being shipped from manufacturers and are with the firmware that is unaware of the light hotspot operations. So, initial set up will still need the blockchain sync to happen, until it catches up to block 1,350,664. That block is when the variable was set to flick hotspots to light hotspots.

Eventually, when the blockchain is removed from the light hotspots, they will no longer need to sync, and their daily data consumption will also reduce significantly.

The true source of truth on sync status

Almost all of us rely on the Helium Explorer, and rightfully so. However, it was notoriously terrible in being up to date about a hotspot’s status. For example, a hotspot may be in “syncing” state for many weeks, even though it could have completed within a few hours of coming online. This leads to many unnecessary questions on how to speed up the sync, when it is not required.

Having personal experience of setting up and observing several hotspots, I can be certain to say that even when a hotspot is “syncing”, it will already start to participate in PoC and getting some rewards. So, being fully “sync” isn’t a critical factor. Furthermore, with light hotspots, being in sync is no longer a requirement, so much so that even the Explorer is no longer showing sync status.

Now, you are here, perhaps you are new owner and is doing some due diligence to make sure things are healthy. I have experience with Kerlink and Nebra models, and they have something in common. Both have status/diagnostic pages to look up, so you can at least get some fundamental details about the status of each and every hotspot.

Kerlink has it on their onboarding page, which is exactly the same place where you initially set up the miner.

Nebra has it on the device itself.

Below is a screenshot from my Nebra hotspot. The part that is essential for you to look at is the Height Status. Both Kerlink and Nebra represents them differently, and I’m sure the other makers have their own uniqueness too. However, the same key metrics are there, the current height your miner has sync up to, and the actual height the entire blockchain is at. You won’t always see the numbers to be the same, and more oftehn the current height is typically trailing behind by a few blocks.

Since we are not in light hotspot mode, the only number you’ll really want to pay attention to is that the miner’s height to be equal or bigger than 1,350,664. Beyond that number, the miner should be operating as light hotspot, and blockchain on the hotspot becomes irrelevant.

Wrapping up….

thank you for reading this far, and if you have recently started your journey on Helium, welcome to the community!

I will wrap up this post with one little tidbit. With my experience with Kerlink and Nebra, the nice thing is that you’ll should never really need to do any firmware updates yourself. The hotspot makers will be pushing the firmware over-the-air to your devices. If there is anything you want to keep watch on, is just the Firmware version. You’ll normally see new versions announced on the Helium discord, and in typical fashion, within a few days to a week, your hotspot will be running on the newer version.

With this, I with you good luck, lots of witnessing and HNT to the moon!

Alternate way to setup a Nebra Rock Pi Helium Miner

[Update 29-May-2022 – the steps here are outdated, I just tried with FW 5.24 and it is better; new post to follow. TL;DR – Follow the included quick start steps, it may take a longer time (20 mins) before you can finish the final assertion. If the scan does not pick up the hotspot, press and hold the button for 10s and scan again. No longer need to power cycle repeatedly.]

Finally, after 13 months, me and my friends’ order of Nebra Helium miners have been delivered. Sure, we aren’t happy that we waited so long, but we are after all victims of the pandemic. The fact that Nebra survived the years and still delivered in the end speaks for itself. Thank you team Nebra!!

Now, it is May 2022, and have the Nebra Rock Pi miners on hand. Eager to setup, but the included steps just don’t work. So, after some googling, and testing with the first 3 miners being set up, we are feeling good about the steps to be outlined below.

Follow the included steps first

If you are here, it’s likely you have already tried the steps provided on the quick start sheet included with the device. In the off chance that you haven’t followed it, give it a try first. In case Nebra has already fixed it. Online version is https://support.nebra.com/support/solutions/articles/24000075252-rockpi-hotspot-quick-start

So, the setup guide states to assemble the device, power up and wait for 5 minutes. Then eventually the green LED will flicker. The problem is that you don’t need to wait 5 minutes, and the green LED doesn’t really do a slow flash, but a quick flash. If you see the quick green LED flash, you are likely going to need to follow the steps below.

If you don’t see any green LED flash, then you probably should wait. Don’t power off the device if the green LED hasn’t started to blink.

VERY IMPORTANT

I’ve read several reports of various miners from different manufacturers burn (damaged) because the antenna was removed while powered on. As a strict precaution, I will caution you to never power up a hotspot if the antenna is removed; and never to remove the antenna if the power is on. Always power off the hotspot before you remove the antenna, for example you are trying to replace it.

The alternate steps

So, if the included steps didn’t work, you can try the following. It will take several reboots (via power cycles), but you should get there eventually. If all goes well, you’ll be good in 30 minutes.

As a preparation, you must have :-

  • Helium app installed and wallet created
  • Nebra app installed and linked to your Helium app

I will start the process with the Nebra app first, but if it fails, you can fall back to the Helium app. Both works, but since it’s a Nebra hotspot, it’s just my suggest to try with the Nebra app first. Within the app, start the process to add a hotspot and let it scan.

  1. Antennas are attached
  2. Power off device
  3. Switch it on
  4. Once you see the green LED flashing, you’ll want to initiate a rescan in the app
  5. When your device shows up, tap on it and follow the wizard to do the set up

Now, the wizard will hang several times, almost like every step of the way. If you don’t see progress, just return to step 2, power off. Interestingly, you’ll get to resume the progress in the wizard. Eventually, you’ll get to specify the height of the antenna and location of the hotspot.

  • Height of the antenna – just an estimate of the elevation off ground level. Doesn’t have to be very accurate.
  • Location – you should, and I encourage you to specify the location accurately. This is to do the right thing by the network. There are those who fake their location to get a better Transmit Scale, but don’t do it. It does not affect your earning, but the earning of others who witness your hotspot’s beacon. If you are caught for it, your hotspot will be put on a blacklist, and it’s game over. So, since it doesn’t really hurt your earnings, there’s no point in doing it.

What’s next after the wizard

At this point, nothing much else to do. As of writing this post, your device should have been shipped with an older firmware, in the pre light-hotspot era. Your device will still be syncing to the Helium blockchain. I will expect it to go through a few firmware updates, and when it syncs till the block that switches it to the light hotspot mode, then mining will begin.

Light hotspot was activated on 11th May 2022, that was a major update for the entire Helium network. It was an amazing feat that the Helium team pulled off. I didn’t expect it to be 100% smooth, and indeed it wasn’t. There was some trial and errors on the change, but I am grateful the team was prepared to deal with most of the hiccups, and we never had to roll back.

The nice thing with Helium hotspots is that you should almost never need to do much management. Even more so now with light hotspots. Firmware updates are automatically done over the air by the hotspot manufacturers. You just need to make sure the device is powered, sitting in a good location and wait for it to make you some passive income.

There are some tools you can get in to, but there is no need to sign up for anything paid. If you have a big fleet and want something to aid management, please go ahead and get a paid service. That’s a post for another time.

Wrapping up….

So for now, I’d say just monitor the sync progress of your hotspot. Just figure out the IP address your hotspot has, and navigate to it using your browser. There is a field that says the block chain sync progress. Eventually, the block chain will be turned off for hotspots. Until then, you’ll want the first sync to complete, as it is the first stage to know it should have transitioned to light hotspot mode.

How do we earn mining $DPR with Deeper Network

in my previous post, I introduced the idea to consider mining $DPR, and you can potentially recover your cost in a little over 66 days. Now, let me show you the math on how that works.

To make sure we are on the same page, here is the CoinMarketCap link to it https://coinmarketcap.com/currencies/deeper-network/

Earning Rates mining $DPR

Mining with Deeper Connect devices is following a unique mechanics called Proof of Credit (PoCr). It is not like any Proof of Work, or Proof of Stake, and it’s not doing any power hungry hashing like PoW Ethereum and Bitcoin. All we need is to keep our Deeper Connect devices online for as much as we can.

Earnings are linear, and so are pretty predictable. How much you earn though, depends on the credit score your device has. The details are known up front, and below is the reference table. Source. There is a slight inaccuracy with the source, and I’ve fixed it in my table below. I have also added in the US$ equivalent, but of course it will vary. I created the table based on the token price of US$0.0319, at the time of this writing.

In order to mine and earn tokens, your device needs to have at least a Credit Score of 100. Earning rate goes up each time you hit additional 100 points. There are 2 ways to increase the Credit Score,

  1. Organic growth – keep the device online 24×7, and share 10MB of traffic everyday. Every 2 consecutive days this happens, your device will earn 1 point. (It has been announce this is about to change, that 2 days requirement will be reduced to 1). Until it gets implemented, let’s keep to the 2 days calculation. It means every 200 days (without missing a day) your credit score will go up by 100, and your earnings goes up.
  2. Stake DPR – Buy some DPR, and stake it. Starting at 1000 DPR to simply get the device on the blockchain for Organic Growth. You won’t earn any DPR, but you will get awarded 10 Credit Score. (It’s stated on Deeper Network’s medium post, that there is 0 credit score. That is incorrect, and I have validated with personal experience and cross checking, that you will get 10. Additionally, you will be given 2 DPR in your Deeper Wallet.) Now, if you are in this for mining, you will likely want to get ahead, and not just wait to grow the score organically. Then you’ll want to consider buying from 5,000 up to 100,000 tokens. The higher you stake, the better APR you get. The current program, known as Basic Mining, pays up to 60% APR with the highest tier at 800 Credit Score.

How much to stake is very much up to you, whatever you can afford to lose.

DYOR, I’m not qualified to give financial advises.

Also, be aware of this, for your first time staking, let’s say to bring the device to a score of 200, you will need 11,000 DPR. The first 1,000 DPR is always needed to bring a new device on to the blockchain, and add on 10,000 DPR to bring credit score immediately to 200.

You can follow Deeper Network’s post to get the staking going. While it is titled for “PC”, it works for me on the Mac too. After you have completed the staking, you will need to give your device a reboot (or power cycle) for it to take effect on the device.

About Basic Mining

Basic Mining is the name of the original mining program that started with the Deeper Connect devices. All devices so far are capable of mining. I personally have the Mini and Pico, and both earn equally well. The v1 program (as I call it), will change from 1st June 2022. Deeper Network calls it Basic Mining 2.0, and you can read more here.

There will be some differences, but essentially the idea remains the same, bring your credit score up to earn more rewards. Let me cover about Basic Mining 1.0 first.

  • Mining begins in under 72 hrs from staking, experience will vary, most of mine happened within 2 hours.
  • Reward period is 270 days, and you get a fixed payout everyday, around the same time.
  • After 270 days, you have the option to un-stake, or re-stake
  • If during the time, your credit score hits the next tier, your earning goes up
  • Credit Score can be increased by natural organic growth, or more staking

All rewards are paid to your Deeper Wallet, which is tied to your device. You are allowed to withdraw from the Deeper Wallet to your own Hot/Cold wallet, using Deeper Network’s bridge. There are 2 bridges, one to Ethereum, and another to Binance Smart Chain (BSC). Most will pick BSC, as it has a much lower gas.

Be aware though, each BSC wallet is limited to receive up to 3000 DPR tokens per day.

You can withdraw your rewards from your Deeper Wallet to your BSC Wallet, then use it to increase your stake. I’ve done it and it works pretty well.

What is changing with Basic Mining?

Essentially, what is changing includes the following :-

  • Staking period from 9 months will be reduced to 6 months
  • You can unstake anytime, and it can be done from within AtomOS. Reportedly from version 1.1.16.
  • For non-genesis miners the mining APR will change every 3 months. 01-Sept-2022, 01-Dec-2022, 01-Mar-2023, 01-June-2023, 01-Sept-2023, and 01-Dec-2023.
  • For those devices that staked before 01-June-2022, they will be grandfathered in to the v1.0 program and APR will remain for the individual 9-months period.

A question most will have is, what happens after 9 months to those devices that have made it to v1.0 program? I haven’t come across a firm answer yet. I can imagine 2 possible outcomes :-

  1. they either stay on the v1.0 program for as long as they keep re-staking
  2. they will follow the v2.0 program once their 9-months have run out

What Did I do?

With my very first Mini, I started with a credit score of 200, and I staked 11,000 DPR. At that time $DPR was about US$0.13. After running it for a few weeks, and having done more research, I felt more confident and increased my score to 500. Why 500? What’s my strategy?

At that time, I couldn’t afford to stake all the way to a credit score of 800. I plotted the chart of Stakes versus Rewards, and found that with 50,000 DPR staked, is the point where the reward curve increases the most. That was also about the point where I was comfortable to invest more in. Hence, that’s the number I picked.

Fast forward to the crypto crash in May 2022, as DPR price dipped, I bought more and increased my stake to 700. I didn’t go for 800, as my device is a few weeks away to hit 800 by organic growth, so I could save myself 20,000 DPR tokens, and wait.

If I have multiple devices, should I distribute my stakes, or concentrate on one?

This is a common question. The answer is simple, and based on the v1.0 rewards rates.

Concentrate mostly on one device first. Each incremental investment in the first device will earn you more DPR rewards every day. Nevertheless, do get every device at least the first 1,000 DPR to get them on the blockchain. Use the time they are online to grow the organic scores.

Wrapping up…

The Deeper Connect devices have the expectation that each network will only have one device. When more than 1 device exists, only 1 will earn the credit score, and it is random. More specifically, each public IP on the Internet is allowed to only host 1 Deeper Connect device that will earn organic score. If ALL your devices are staked to 800 credit score, then this is not a concern.

Some have worked around this by attaching the Deeper Connect Mini/Pico to a 4G mobile router with success, but still keeping only to 1 device per Internet IP.

If this gets you interested, please consider using my referral link when you purchase your device from the Deeper Network store.

DYOR – Do your own research. I’m a tech guy, not a financial advisor. Hope you enjoy learning about some tech from my posts. I am not qualified to write about financial advices, and please make your own decision. What I will say, only spend what you can afford to lose. Things are way too unpredictable in the cryptoverse. Have fun and good luck!

Mining $DPR has better ROI vs ETH

I’ve been GPU mining ETH for over 12 months, and DPR mining with Deeper Connect Mini for 6 months. I can say hands down DPR has a much better ROI than ETH.

If anyone has tried to set up their own ETH mining rig, it is clear that is it not a simple task. You’ve got to have good knowledge and experience in building Intel PCs, and even for a myself with 20 years experience, it was the first time I had to build one with 6 GPUs. That’s the first step, and the next is to keep it cool and run nicely 24×7.

Trying to keep ETH rigs running non-stop is another challenge.

The mining rig can hang in multiple ways and you’ll have to give it a reboot. So monitoring and reacting to issues is key to maximise your mining potential. It can hang in the middle of the night, and you’ll lose hours of mining rewards.

The learning curve to set up a mining rig, and to operate it well is not for everyone. Let alone that the threat of Ethereum moving to Proof-of-Stake is eventually going to happen. Sinking S$10K into a mining rig that makes like maybe S$10 a day is going to take over 2.5 years to breakeven.

In other words, if you want to start ETH mining now with new investment, think twice.

Mine $DPR instead of $ETH

Consider this as an alternative, join Deeper Network’s DPN. In a nutshell, it is a VPN solution, that has no subscription. DPN is short for Decentralised Private Network. You put a device on the Internet, sharing your home internet connection and at the same time you get to earn a passive income.

Low barrier of entry – To get started with mining DPR you will need a specialised hardware, but it is so much cheaper to buy than a decent GPU like the RTX3070. As of this post, there are 2 options, the Deeper Connect Mini (UP US$349), and the Deeper Connect Pico (US$248). I have both, and if you are a serious miner, I strongly recommend the Mini. It is very stable, and you can almost set and forget. Use my referral links to get 5% off the purchase. (Or coupon love_jasonyzs when you check out)

Easy to set up – Both the Mini and Pico are really easy to set up, there are two main steps, first is to get the device on to your home network, and second is to enable mining. Both steps are relatively easy, and I’ll have subsequent posts to take you through. The good news is the Deeper Connect is going to make the second step even easier in coming firmware releases.

Earn between $0 and US$5.24 a day – US$157.31 per month (30 days). These numbers are based no today’s price where each DPR is US$0.0319. That is pretty good returns, and your ROI with the mini is in just over 66 days!! (I’ll go into the details in an upcoming post, it does require staking to the max with 100,000 DPR).

Sustainability – crypto projects are very much like any startups, there will always need a start for quick adoption, and then move towards sustainability. I’ve been following the project since Dec 2021, and they definitely have the right ingredients to make this successful. They have positioned themselves to be the web 3.0 platform, and the roadmap looks very good. The team have proven themselves to be able to execute and to bring their vision to fruition. I’m so ready for what they will dish out next.

DPN is after all the primary use case

The primary purpose of the device is to give you “VPN Service” for life. I’ve used it myself and it works pretty well. So if having access to say an upcoming sports event stream from a different country is something you fancy, this can be a good solution for you. Nothing like being able to catch your favourite shows and have a passive income with the same device!

Order your units now

Deeper Network is running a campaign for almost 7 days more. You can win yourself a Mini, Pico or NFT. Please join using my referral https://wn.nr/UEYDqL and I with you good luck!! Campaign ends on 23rd May (Mon) at midnight UTC.

Congrats to those of you who won!!

If you are eager to get started, buy your units ASAP!! Here are my referral links.

DYOR – Do your own research. I’m a tech guy, not a financial advisor. Hope you enjoy learning about some tech from my posts. I am not qualified to write about financial advices, and please make your own decision. What I will say, only spend what you can afford to lose. Things are way too unpredictable in the cryptoverse. Have fun and good luck!